Gideros Project Template for your Indie Games

Gideros Project Template for your Indie games
This article will explain how to create a common Gideros Project Template for all your Indie games developed using the amazing Gideros Studio.
Game configuration
The first step is to configure the game in the Gideros Studio editor.
Click on the right button of the mouse to open the Gideros project properties window where you will choose your game name:
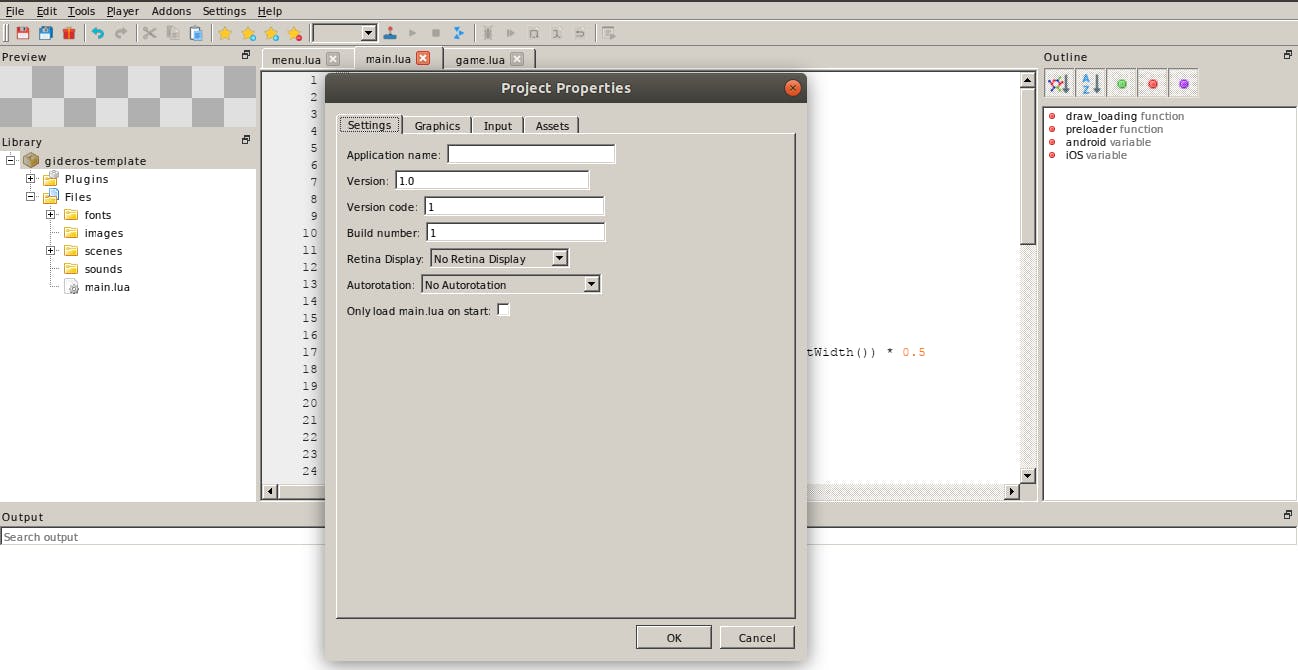
Additionally, the following properties can be set from this window:
Settings tab: current version of the game, build version, retina display and autorotation.
Window tab: scale mode (recommended letterbox), logical dimensions, window size, orientation (Portrait or Landscape) and FPS (30 or 60).
Input tab: behavior of mouse and touch events.
Starting point file
The main.lua file is the entry point for your game. The following lines have been added to the beginning:
application:setKeepAwake(true)
application:setOrientation(Application.PORTRAIT)
application:setBackgroundColor(0xffffff)
Why these lines were added?
You will check from Gideros documentation for Application Class to answer the previous question:
Application:setKeepAwake keeps running your game when there are no touches for some period of time.
Application:setOrientation sets the orientation of your game: PORTRAIT or LANDSCAPE.
Application:setBackgroundColor sets the background color of your game in hexadecimal, by default 0xffffff is the white color. You could change it for another you want.
Game assets
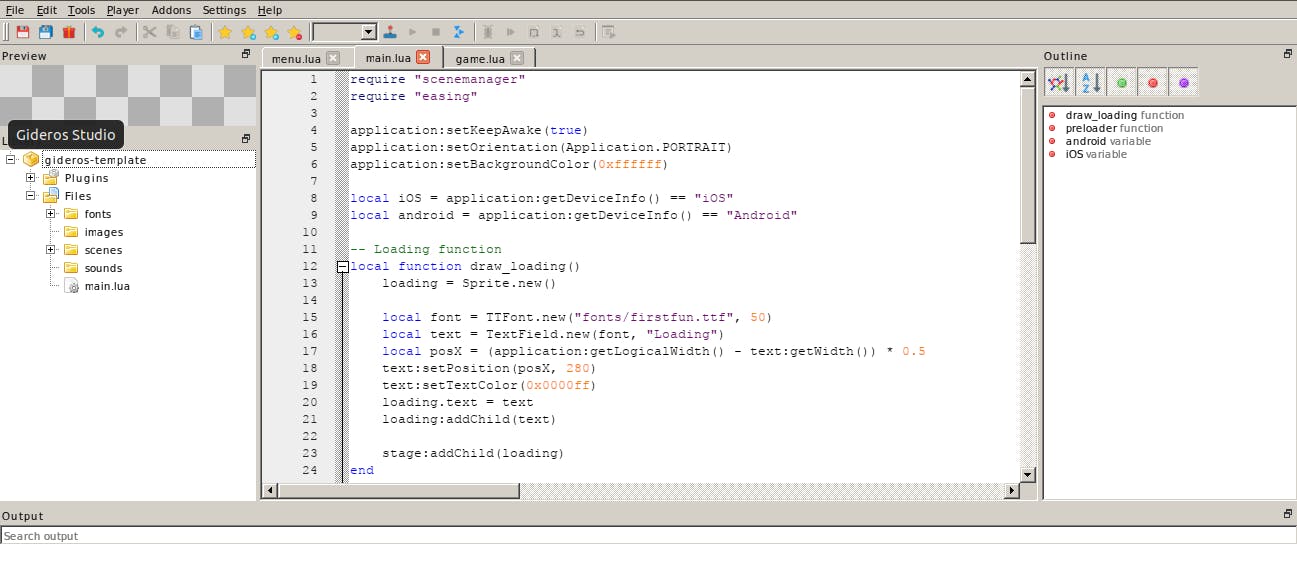
In this point, you will need to store your game assets (images, music, sounds, fonts) in some specific folder.
For this purpose, the following folders within Files are created:
The images folder is where all your game graphics are placed.
The sounds folder is where music and sounds of your game are set.
The fonts folder is where all your game fonts are localized.
Gideros Studio supports Bitmap and TrueType Fonts, I recommend using TrueType Fonts (TTFonts).
For example, download the First Fun Font which is Free for commercial use and put it into fonts folder.
Loading game
Define one draw_loading local function in the main.lua file which will show the Loading text message when your game begins.
-- Loading function
local function draw_loading()
    loading = Sprite.new()

    local font =  TTFont.new("fonts/firstfun.ttf", 50)
    local text = TextField.new(font, "Loading")
    local posX = (application:getLogicalWidth() - text:getWidth()) * 0.5
    text:setPosition(posX, 280)
    text:setTextColor(0x00ff11)
    loading.text = text
    loading:addChild(text)

    stage:addChild(loading)
end
Gideros Studio uses a nodes hierarchy graph to draw something in the game screen and the stage variable is the root node in the graph.
This local function will use the Sprite and TTFont Gideros classes to do the following:
Creates a loading Sprite object which must contain the Loading text message.
Defines a local font variable which uses the TTFont Gideros class to load firstfun TrueType font with size 50.
Creates a local text variable which is a TextField object with Loading string text.
Sets the X position and the text color of the text variable.
Adds the text variable to the loading Sprite object
We wish to render loading text in the screen, so add the loading Sprite object to the stage.
Detecting Platform
Define two local variables iOS and Android in the main.lua file to know which is the native platform when the game is running.
local iOS = application:getDeviceInfo() == "iOS"
local android = application:getDeviceInfo() == "Android"
Both variables give you the value true when your game is running on an iOS or Android device, so you can use them to write custom Lua code depending on the target device.
Scene Manager plugin
The SceneManager plugin allows you to manage all your game scenes.
Go to Plugins folder, click on the right button to Add Plugin and the list with all plugins will be shown:
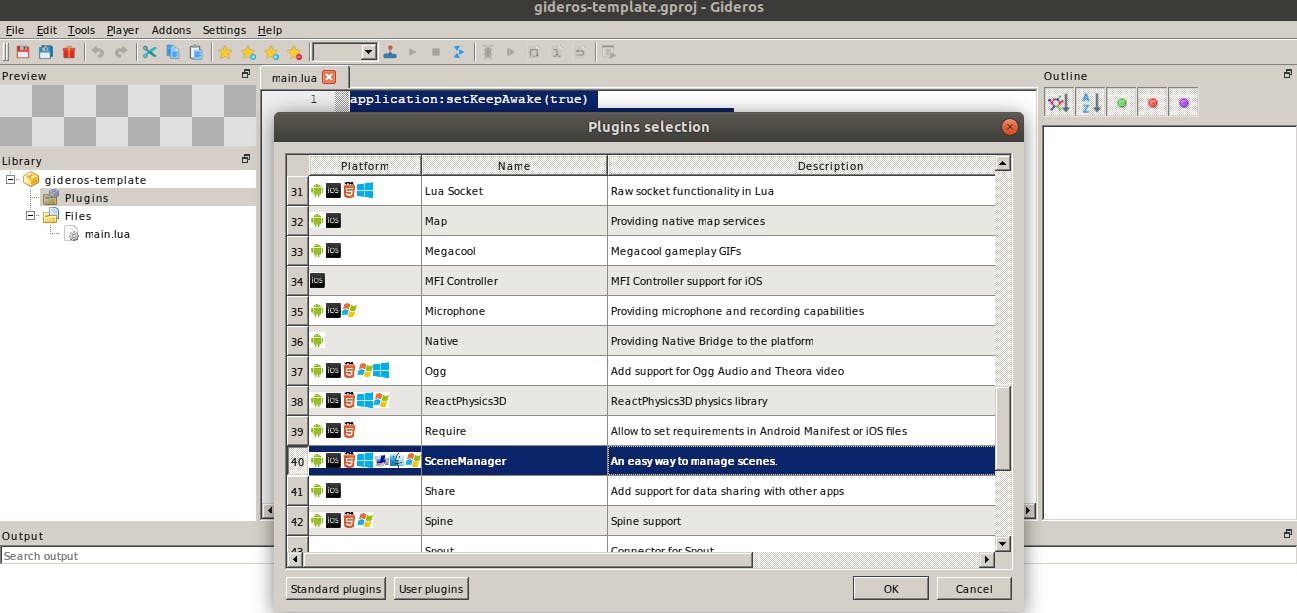
Select Scene Manager and Easing plugins and click on OK button to add both to your Gideros project.
Go back to the beginning of the main.lua file and use required sentence to import these plugins:
require "scenemanager"
require "easing"
Game scenes
Once you have added Scene Manager and Easing plugins, then Menu and Game scenes will be created in the Gideros project template.
Gideros provides the Sprite Class as the base class for your game scenes. A sprite object describes Scene Graph containing child nodes.
Every game scene will extend Sprite class following the oriented object programming approach.
Menu Scene
The Menu scene should be the first scene shown in your game, this is where you show the different options of your game.
First, a scenes folder is created within Files, this folder is where all game scenes are placed.
Second the menu.lua file is created within the scenes folder with the following Lua code:
MenuScene = Core.class(Sprite)

-- Static setup
function MenuScene.setup()

end

-- Constructor
function MenuScene:init()

end
The static setup() function allows to loading of all MenuScene assets (images, music, sounds, fonts,...).
The init function is the constructor for MenuScene Sprite which is called for sceneManager for creating the Menu scene.
Game Scene
The Game scene is the core game loop of your game, where the magic happens.
Just create a game file within the scenes folder with the following Lua code:
GameScene = Core.class(Sprite)

-- Static setup
function GameScene.setup()

end

-- Constructor
function GameScene:init()

end
The static setup() function allows to loading of all GameScene assets.
The init function is the constructor for GameScene Sprite which is called for sceneManager to create the Game scene.
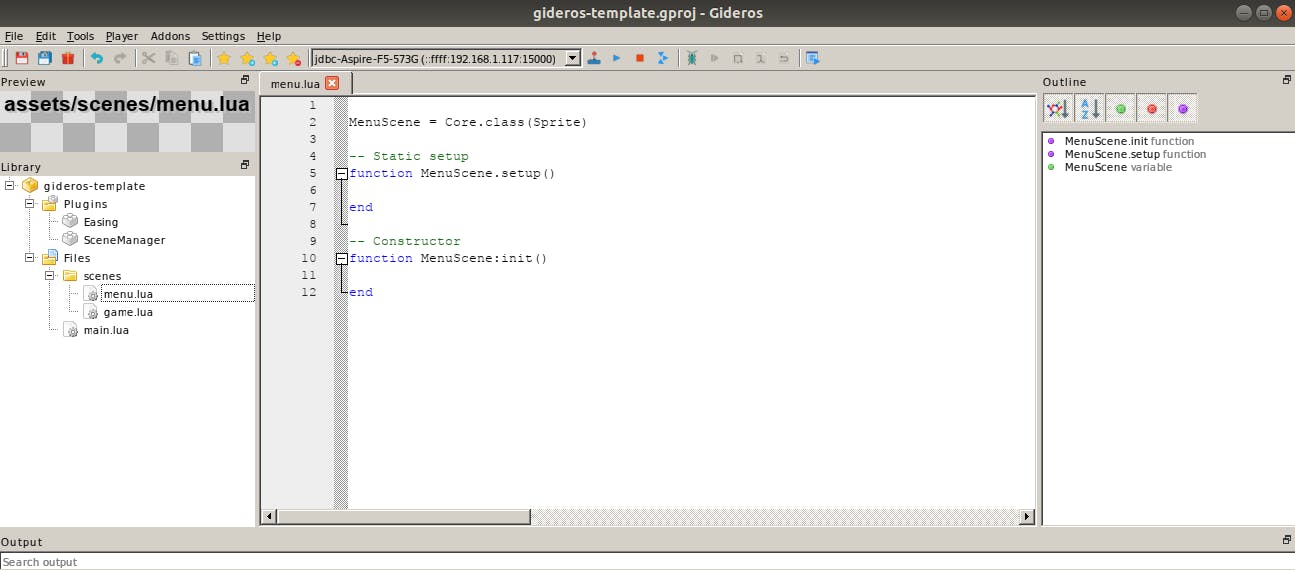
For instance, this is how it looks menu scene in Gideros Studio editor:
Using scenes
Go back to main.lua file and write some Lua code at the end of this file:
draw_loading()
stage:addEventListener(Event.ENTER_FRAME, preloader)
The above Lua code will do the following two things:
Invoke the local draw_loading function.
Add ENTER_FRAME event listener to call the preloader function the first time the screen must be rendered. Click on ENTER_FRAME event for specific info about this event.
So we need to create the local preloader function with the following Lua code:
local function preloader()
    stage:removeEventListener(Event.ENTER_FRAME, preloader)

    -- Load all your assets here
    MenuScene.setup()
    GameScene.setup()

    -- List of scenes
    scenes = {"menu", "game"}

    sceneManager = SceneManager.new({
        ["menu"] = MenuScene,
        ["game"] = GameScene
        })
    stage:addChild(sceneManager)

    -- MenuScene is the first scene to show
    local currentScene = scenes[1]

    local timer = Timer.new(2000, 1)
    timer:addEventListener(Event.TIMER,
                function()
                    -- Remove loading scene
                    stage:removeChild(loading)
                    loading = nil
                    sceneManager:changeScene(currentScene)
                end)
    timer:start()
end
The preloader function must do the following:
Remove the ENTER_FRAME event listener. We only need to call the preloader function once.
Invoke MenuScene.setup and GameScene.setup functions to load the scenes assets.
Define the game scene list that will be used by the sceneManager variable.
The variable currentScene defines MenuScene as the default game scene.
Use the Gideros Timer class to wait 2000 milliseconds until the Menu scene is shown by the sceneManager variable.
Finally this Gideros Template Project should be used as starting point to develop your upcoming hit Indie game.
All my Android games published to Google Store has been developed using these template.
Enjoy it and do not hesitate to leave some comment.
